Posts

Showing posts from June, 2019

Dusty: Motor Assemblies Fit Tested

Image
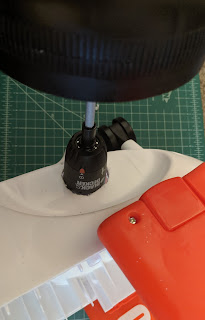
I fit tested the motors in the holes I cut just above the original axle holes. They fit nicely but will need some internal support and maybe some zip ties to hold them in. Fit this way there is a pretty good space between both of the motors inside. Plenty of room for wiring. The tires are going to be pretty far apart. I may need to cut the axles down. I'd rather not. We'll see. Wheel/Motor Assembly Fit Test

Dusty: Fitted Axles

Image
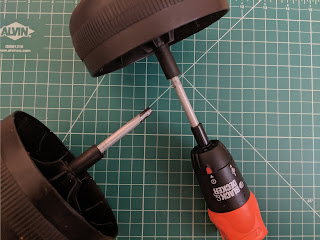
I groud down the ends of each axle so that they snugly fit into the 1/4 socket of the screwdrivers. Ultimately, I'll epoxy or put shrink tube around them to keep them from flying off. Axles Connected to Screwdriver

Dusty: Motors for Dusty

Image
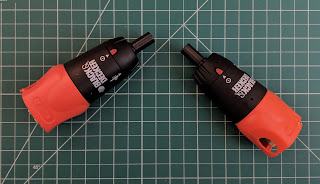
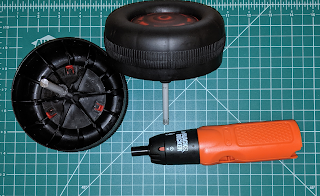
I got two Black & Decker battery powered screw drivers. These are geared down nicely but will scoot Dusty a round pretty quick. I removed and cut down the casing as much as possible while still having it hold everything together. There is only one pin that needs to be removed to open up the case. Very easy. I'll solder some hookup wire to these so I can connect to the motor driver shield with a separate motor power pack. You don't want to power these off of the Arduino board. Motors for Dusty

Dusty: Prototype Bump Sensors

Image
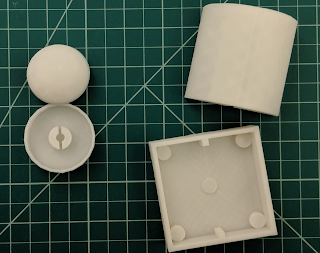
These are two prototype bump sensors. Micro switches would be mounted in the bottom of the outer case with squishy foam tape holding the two sections together. These aren't final and still require work. Dusty's nose sticks so far out that bump sensors would have to be extended really far. Typical whisker sensors might work better. These sensors might work better on the back. Prototype Bump Sensors I'll be posting these designs to Thingiverse account at some point. I used TinkerCAD to design these.

Dusty: Axle Sliced

Image
I cut the front axle. It looks like the axle is aluminum. It cut pretty easy with a oscillating cutoff blade. The diameter is 1/4 in. Which is great because with a little filing it will fit the 1/4 in socket of the electric drill.

DT Labs Favorite Video

Image
Cool! This speaks to us. DigitalTRASH Labs' favorite video...

Dusty: Printing Bump Sensors

Image
Dusty will need some sort of bump sensors if he is going to roam around the Aviation Village floor. Here I'm 3D printing a prototype bump switch assembly. A 3D printer is an invaluable tool for creating robotics parts. I have a Monoprice Mini Select V1 printer. It can be a pain in the butt but it was cheap (<$200) and I've had a lot of success with it. It does have a small build area (120mm x 120mm). I would not recommend it for a novice though. Newer versions of this printer are much better.

Dusty: New Guts for Dusty

Image
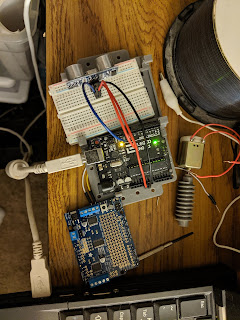
Working on some new guts for Dusty This is an Arduino Uno with an AdaFruit Motor Shield V2 and a ultrasonic distance sensor. I love Adafruit . Buy their stuff! (non-paid endorsement) I haven't done Arduino programming in a while but I got these working really fast. This was just to make sure they were functioning. Giving Dusty some intelligence will take a bit more work. At some point I'll post the script. Dusty's New Brains?

Dusty: Tools

Image
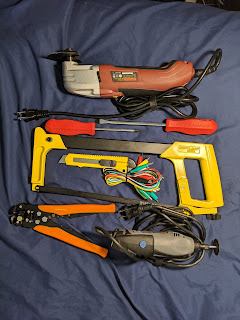
A collection of the tool that I'm using to gut Dusty. Included are screw drivers, Dremel, hacksaw, oscillating tool and more that you can see. I made a run to Harbor Freight to get most of this (not the Dremel). Harbor Freight (non-paid endorsement) is a great place to get cheap medium/low-duty tools. I'm not a heavy user so these should last a long time for me.  

Dusty: Inside "Dusty"

Image
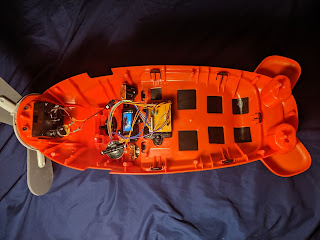
You can open up Dusty by removing the screws underneath. The phillips head screws are deeply set so a long screwdriver is recommended. Once you pull it apart you'll see the guts. (excuse the crappy photos) The Top (Brains) The Bottom (Empty Space) As you can see there isn't all that much inside. The electronics don't take up much space. The majority of it is wiring connecting all the switches to the main board. You'll note that the propeller is attached to the top part. The bottom has lots of room for your custom equipment.

Dusty: Aviation Village "Airplane Hacking" Competition

Image
The DEFCON Aviation Village announced it's "airplane" hacking contest. Details on the contest can be found at the Aviation Village contest page. The goal of the contest is to "hack"/"pimp" a kids airplane scooter. The scooter is supposed to be "Dusty" from the Disney film Planes. Five teams will be selected, based on their proposals, to receive a free, stock, Dusty, to hack. The judges will pick the most cool hacked/pimped airplane made by the contestants. If you're not a proposal winner you can still bring your own Dusty and compete in the contest. But you must use the exact same model as provided by the Village. You can purchase Dusty at Amazon:  https://www.amazon.com/gp/product/B00MX2TQ1M  or other retailers as long as it is the same one. If your entry has some very unique features, the village may ask you to bring it back in future years. Think big and have a development plan if you'd like to bring your Dusty